Getting Started with ICEfaces 3ICEfaces 3 is the new version of the ICEfaces framework that integrates with JavaServer Faces (JSF) 2. With ICEfaces 3, our goal is to deliver the highest value existing ICEfaces features, as well as important new enhancements, cleanly integrated into the JSF 2 platform. There are a number of ways to take advantage of ICEfaces 3 in your JSF 2 application: First, add the icefaces.jar to your project. This immediately allows you to take advantage of Direct-to-DOM (D2D) rendering technology. D2D only sends browser DOM changes from the server to the browser, minimizing bandwidth consumption without the need to specify the new "f:ajax" component in your pages. Once the icefaces.jar is added to your project, you can also take advantage of ICEfaces Window Scope and Single Submit features. After adding the icefaces.jar to your project, you can start adding components:
Finally, you may want to take advantage of asynchronous server-initiated updates using AJAX Push. Adding icepush.jar to your application enables Ajax Push, and allows you to add collaborative capabilities that will revolutionize your application.
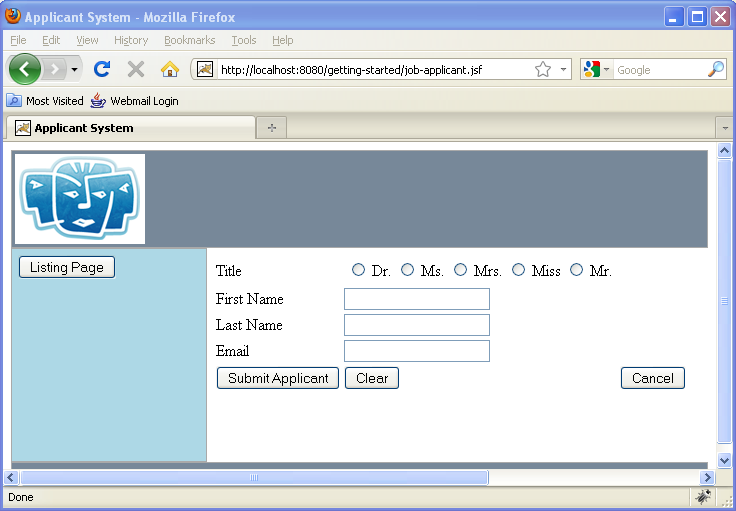
This tutorial will discuss the following topics related to ICEfaces 3: Adding ICEfaces 3 to a JSF 2 ProjectDirect-to-DOM RenderingThis tutorial makes use of a JSF 2 application. The application consists of a page to add a new Job Applicant:
And a page that displays the applicants:
The clear button in job-applicant.xhtml consists of the following markup: <h:commandButton id="clearButton" value="Clear"> <f:ajax event="click" render="@form" listener="#{applicantController.clearForm}" immediate="true" /> </h:commandButton> Here we see the use of stock JSF tags including the new (as of JSF 2) f:ajax tag. The render="@form" attribute on the f:ajax tag informs JSF that only the form should be rendered after the lifecycle is executed. Pressing the "Clear" button under these circumstances will generate the following response, which includes the entire form: <?xml version='1.0' encoding='UTF-8'?> <partial-response> <changes> <update id="form"> <![CDATA[<form id="form" name="form" method="post" action="/gettingStarted/job-applicant.jsf" enctype="application/x-www-form-urlencoded"> <input type="hidden" name="form" value="form" /> <div class="header"> <img src="/gettingStarted/javax.faces.resource/icefaces.png.jsf?ln=images" alt="" /> </div> <div class="content"> <div class="menu"> <input type="button" onclick="window.location.href='/gettingStarted/applicants.jsf'; return false;" value="Listing Page" /> </div> <div class="contentBody"> <div id="form:table"> <table> <tr> <td> <label for="form:title">Title</label> </td> <td> <table id="form:title"> <tr> <td> <input type="radio" name="form:title" id="form:title:0" value="1" /> <label for="form:title:0"> Dr.</label> </td> <td> <input type="radio" name="form:title" id="form:title:1" value="2" /> <label for="form:title:1"> Ms.</label> </td> <td> <input type="radio" name="form:title" id="form:title:2" value="3" /> <label for="form:title:2"> Mrs.</label> </td> <td> <input type="radio" name="form:title" id="form:title:3" value="4" /> <label for="form:title:3"> Miss</label> </td> <td> <input type="radio" name="form:title" id="form:title:4" value="5" /> <label for="form:title:4"> Mr.</label> </td> </tr> </table> </td> <td> </td> </tr> <tr> <td> <label for="form:firstName">First Name</label> </td> <td> <input id="form:firstName" type="text" name="form:firstName" value="" /> </td> <td> </td> </tr> <tr> <td> <label for="form:lastName">Last Name</label> </td> <td> <input id="form:lastName" type="text" name="form:lastName" value="" /> </td> <td> </td> </tr> <tr> <td> <label for="form:email">Email</label> </td> <td> <input id="form:email" type="text" name="form:email" value="" /> </td> <td> </td> </tr> <tr> <td> <input type="submit" name="form:j_idt49" value="Submit Applicant" /> </td> <td> <input id="form:clearButton" type="submit" name="form:clearButton" value="Clear" onclick="mojarra.ab(this,event,'click',0,'@form');return false" /> </td> <td> <input id="form:cancelButton" type="submit" name="form:cancelButton" value="Cancel" /> </td> </tr> </table> </div> </div> <div style="clear:both;"></div> </div> </form>]]> </update> <update id="javax.faces.ViewState"><![CDATA[1247154892383314770:-4900614983041719481]]></update> </changes> </partial-response> ICEfaces renders component markup to a server-side DOM (Document Object Model) that reflects the current client view. Each time the JSF lifecycle runs a DOM comparison is done and, if there are any changes, a concise set of page updates are sent back to the client to be applied to the page. We call this Direct-to-DOM or D2D rendering. Adding the ICEfaces 3 library to an existing JSF 2 application will provide dynamic partial-page-updates for all compliant components, without the need to specify the "f:ajax" component in your pages. Make the following change to the "Clear" button as we will no longer need the f:ajax tag (the clearForm method parameter will have to be changed from an AjaxBehaviorEvent to an ActionEvent): <h:commandButton id="clearButton" value="Clear" actionListener="#{applicantController.clearForm}" immediate="true" /> Now, simply add the icefaces.jar to the application and we have Direct-to-Dom (D2D) rendering applied to the page. When we press the "Clear" button this time, we get the following response: <?xml version='1.0' encoding='UTF-8'?> <partial-response> <changes> <update id="javax.faces.ViewState"><![CDATA[1197926691644194967:-7719694313423626628]]></update> <eval><![CDATA[ice.applyFocus('form:clearButton');]]></eval> </changes> </partial-response> Notice the difference in the amount of markup sent back in the response - and this is for a small form with only four fields. Direct-to-DOM rendering is powerful stuff. The beauty is that from a developer point of view, it takes place automatically under the covers. This is what we call Automatic Ajax. The AJAX is built in to the framework and you do not have to concern yourself with how updates are applied, Direct-to-DOM rendering takes care of it for you. Single SubmitThe Single Submit feature is basically the ability to specify that one component will execute in the JSF lifecycle. ICEfaces 3 Single Submit is similar in intent to ICEfaces Partial Submit, but is an improvement which leverages JSF 2 expanded capabilities. The <icecore:singleSubmit> tag is a convenient and easy way to Single Submit enable standard h: components, without having to litter the page with <f:ajax> tags. It allows an entire page region to be enabled at once. Simply add the icecore namespace to your page. In job-applicant.xhtml add the following: xmlns:icecore="http://www.icefaces.org/icefaces/core" And then nest the tag in your form: <icecore:singleSubmit submitOnBlur="true" />
All the form fields will now behave as if they have a nested f:ajax tag with the execute="@this" attribute. As the user tabs through fields in the form, the individual fields are executed in the JSF lifecycle and immediate feedback is provided, enhancing the user experience:
In this case, we have tabbed through the first three fields and those components have been executed on the server. They all have the required="true" attribute and because nothing was input in the field, a FacesMessage was automatically generated and output in the page via the h:message tag. We have arrived at the email field without performing a full form submit, but have been able to generate feedback on fields we have already visited. Window ScopeICEfaces 3 also features a custom scope called "Window" scope. This custom scope is designed to fill in a gap in the existing scopes available for JSF 2, as it exists for the life of a browser window or tab including surviving reloads and refreshes.
Adding ICEfaces ACE Components
Key features of the ACE Components include:
See the Getting Started with the ACE Components topic to start using the ACE Components in your application.
Adding ICEfaces ICE Components
The ICE components are primarily implemented using traditional JSF server-side rendering techniques with limited JavaScript. When combined with ICEfaces automatic-Ajax technology, the ICE Components exhibit extensive partial-page-rendering, providing a rich, dynamic user-experience, even on older legacy browsers. The ICE Components are recommended under the following circumstances:
See the Getting Started with the ICE Components topic to start using the ICE Components in your application.
Adding AJAX Push
ICEfaces 3 provides a new [API] for using Ajax Push from within your application. As a developer, the class you need to be aware of is org.icefaces.application.PushRenderer. The PushRenderer contains the methods to support using Ajax Push in your application. The new API is very similar to the SessionRenderer API from ICEfaces 1.8.x. Add a session and all associated pages (views) to a group using: PushRenderer.addCurrentSession(String groupName);
Add only a particular page to a group using: PushRenderer.addCurrentView(String groupName);
When something of note changes in the application, you can request the client get a notification to get the updates by calling: PushRenderer.render(groupName); You can also use the icecore:push tag to automatically configure Ajax Push behavior on a per-view basis.
<icecore:push group="applicantsGroup"/>
We will use this technique in our tutorial application to update the applicants page after a new job applicant has been added. First, add icepush.jar to the application. Next, go to applicants.xhtml and add the icecore namespace to the view: xmlns:icecore="http://www.icefaces.org/icefaces/core" In applicants.xhtml add the icecore:push tag to the page: ... <ui:define name="content"> <icecore:push group="applicantsGroup" /> <h:dataTable value="#{applicants.applicantsList}" ... The icecore:push tag ensures any user viewing this page will receive an update when the PushRenderer renders the 'applicantsGroup'. The next step is to push an update out to everyone once a new job applicant has been added. In our ApplicantController.java class we add the following to the addApplicant() method: ApplicantController.java
PushRenderer.render("applicantsGroup");
This was a simple two step process of associating a push group with a page and then making a render call to that group when the page has changed. Let's see it in action. Open a browser window in Internet Explorer and one in FireFox. This will create two separate sessions running in our tutorial application. In FireFox, we see a job applicant already added to our applicants list:
In Internet Explorer, we now add a new job applicant:
After the "Submit Applicant" button has been pressed, the Firefox window immediately receives an update via AJAX push:
With AJAX Push added to the application, users receive real-time updates from the server without needing to initiate a request to the server.
Adding icefaces.jar, icefaces-ace.jar and icepush.jar to your JSF 2 applications will equip you with all the tools necessary to create AJAX enabled Rich Internet Applications.
Tutorial Source Code Downloads
|
 Getting Started with ICEfaces 3


© Copyright 2021 ICEsoft Technologies Canada Corp.